


If you run any kind of eCommerce store, regardless if you use Shopify, WooCommerce, BigCommerce, Magento, or the handful of other eCommerce solutions, you know the lifeblood of your store is targeted traffic.
Google Shopping Ads (Google Merchant Centre), otherwise known as product listing ads (PLA), have been around a long time but certainly haven’t been promoted or used by the gurus spruiking Social Media courses and SEO. Certainly it’s an oversight, as there is gold to be found in the Google Shopping ads strategy, if done correctly.
Table of Contents
Why Google Shopping works
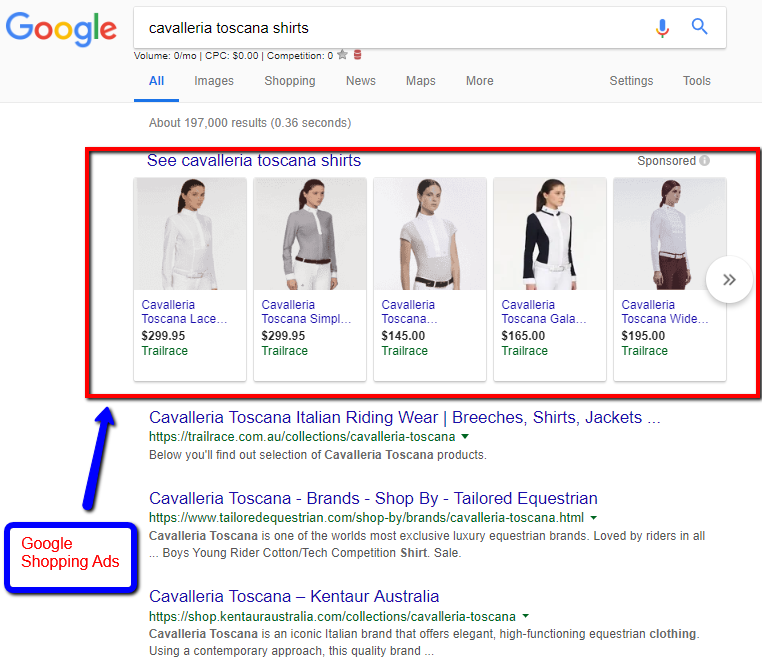
The most obvious reason PLA ads work, is that visitors that click on a PLA ad in Google, have significantly more buyer intent than a Facebook user who has the ad forced into their feed. Generally, if a shopper clicks on a Google Shopping ad, they have searched for that particular product using buyer intent keywords, and with the learning capabilities of the Google ad algorithm improving all the time and the learning capability within a campaign, the conversions will improve as a campaign matures.
Why are they not mainstream?
Actually, in the eCommerce space they are, and the big eCommerce players certainly use them and know how to generate revenue and profit from them. Like any other marketing channel, the cost involved is directly related to the competition, and in competitive markets, the cost per click can still be prohibitive. However more than likely the main reason store owners shy away from it, is the need to set up a Google merchant feed.
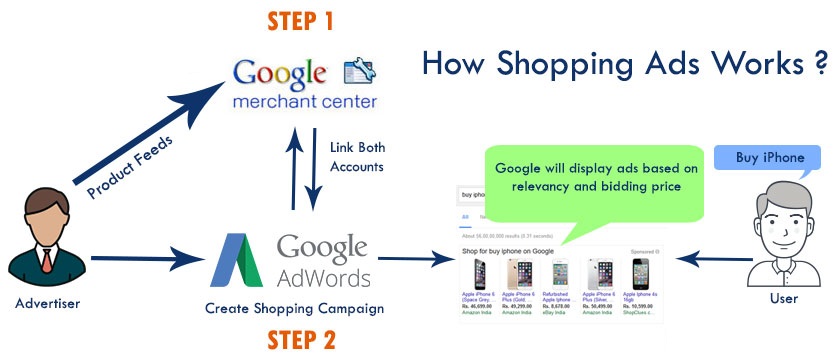
Image Source: https://ppc.org/comparison-google-shopping-vs-google-adwords/
How Google Shopping ads work
Setting up a campaign is a multi step process. As you can see from the graphic above, you need to send your store product feed to Google Merchant Centre where your feed and products will be assessed and either approved or disapproved. After linking you Google Merchant account with you Google Ads accounts, you are then able to setup shopping ad campaigns.
Google Merchant Centre & Product Feeds
To have any chance to make revenue or profit, you need to make sure you feed is setup correctly. All the major platforms have plugins or extensions to make the process really easy, and Shopify even have their own in-house extension to create a feed which you can upload direct to Merchant centre. While this makes it easy for the average online store owner to get their ads up and running, the default settings and feed can sometime lack the detail that will go a long way to making a campaign successful. Not all feeds are the setup the same, and certainly you need to understand how they work intimately to have success.
To understand what a product feed is, you can think of it as a file (.xml, .csv, .txt) that has all the information of every product in your store. In a .csv file, it essentially is a spreadsheet with columns of all the attributes of your product catalog. See below:

This is obviously a very lengthy and tedious process if you do it manually, and if you want to add some unique elements or optimize your feeds, it’s difficult using a spreadsheet.
Luckily there are some really handy tools on the market that help you create and optimize your feeds. Probably the most popular player in this market if GoDataFeed, however we have had more success with DataFeedWatch, and frankly find it more user friendly and more intuitive. It also has a much larger range of channels available. Not only can you create PLA feeds, but Amazon, Ebay, WalMart, Adroll, Amazon Product Ads, Shopzilla, and many many more.
Creating A Shopping Feed With DataFeedWatch.com
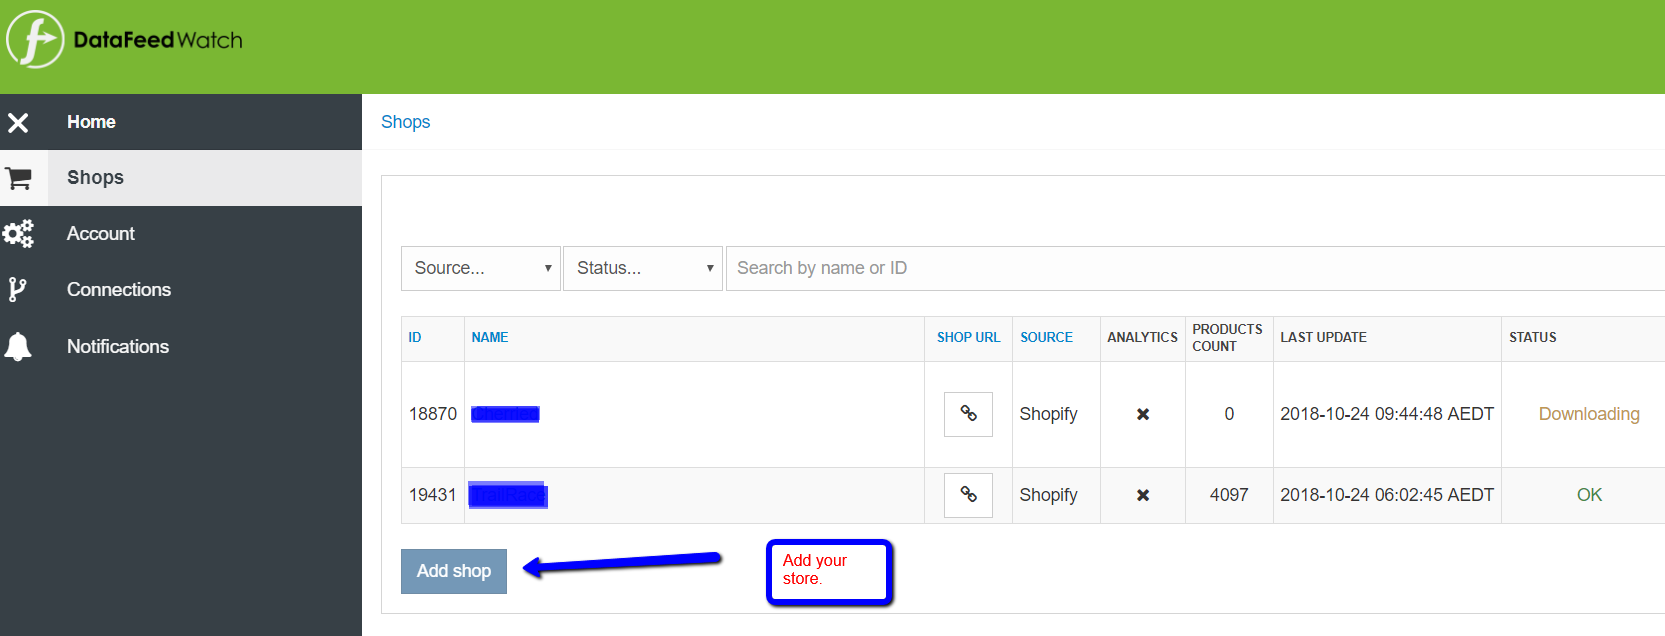
1. Add A Shop
Once you’ve setup your account with Data Feed Watch, you’ll be able to add your store in the dashboard. Once you’ve followed the steps for your particular eCommerce platform, all your products will be downloaded to DataFeedWatch.com.

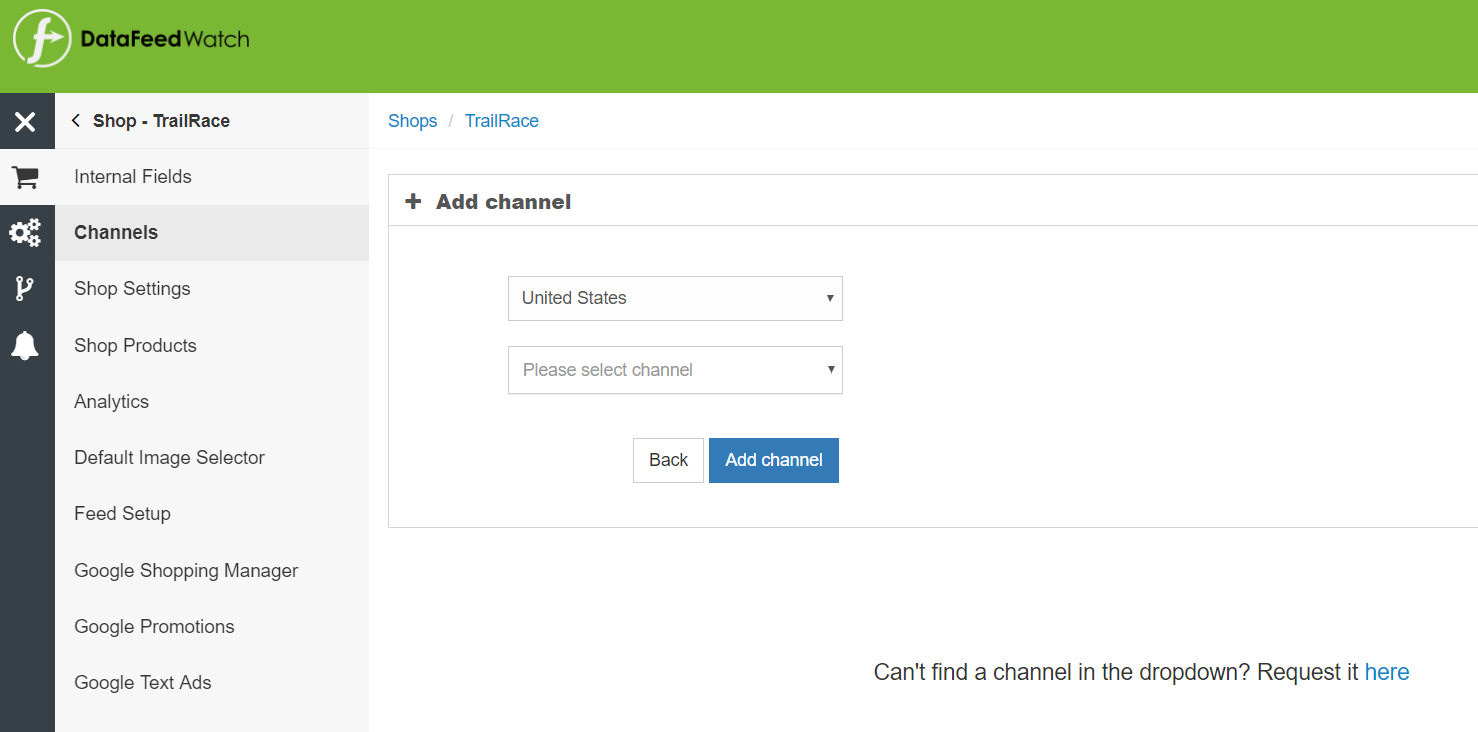
2. Add a channel
The next step is to add a channel. Obviously for this example, you would choose Google Shopping within the market you want to advertise in.

3. Mapping Fields
This is where the magic happens. More than just a simple feed, you are able to optimize your entire feed by adding, removing and combining certain elements of your shop feed, to create a unique Google Shopping feed. The default template for Google Shopping that DataFeedWatch provides is rather fool-proof, but you have the ability to get creative with your titles and descriptions etc. Be aware that you still will need to have the basic criteria for a Google shopping feed existing within your store feed, such GTIN, Availability, Price etc.
Example: Let’s say you have uploaded a large product feed to your Shopify store, but there are some products with missing descriptions, which you will get to later. With mapping, you can choose to leave out products without a description in your shopping feeds, ensuring these errors are omitted.
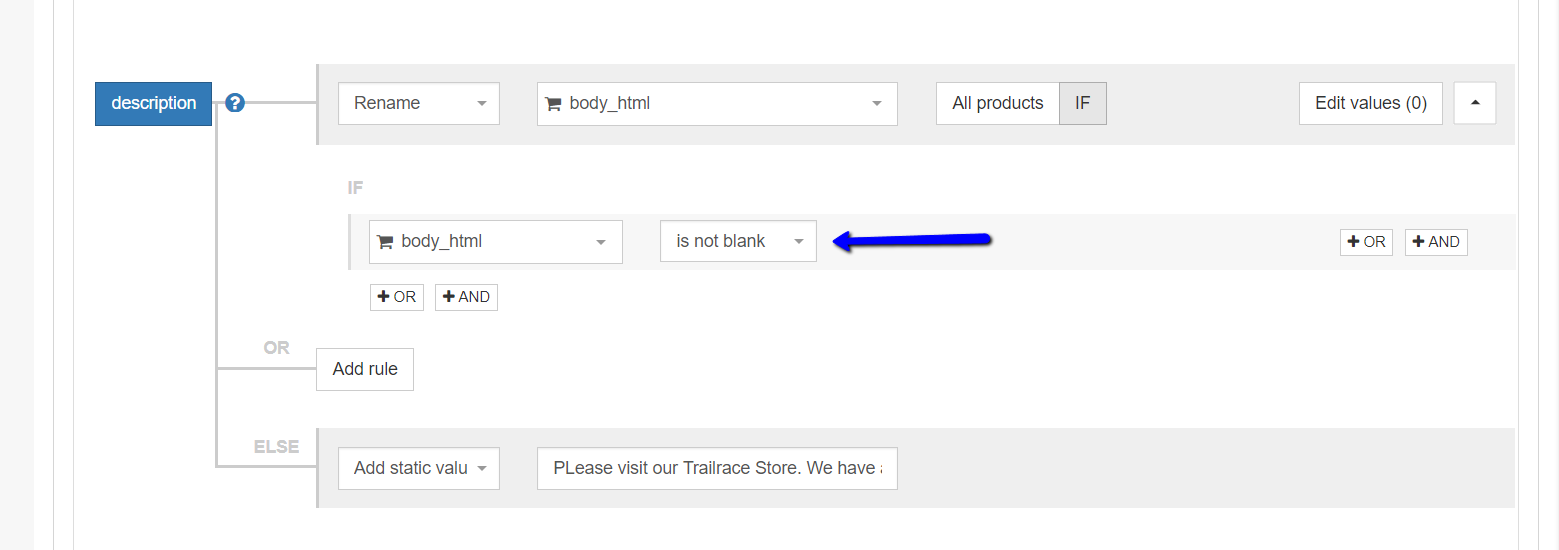

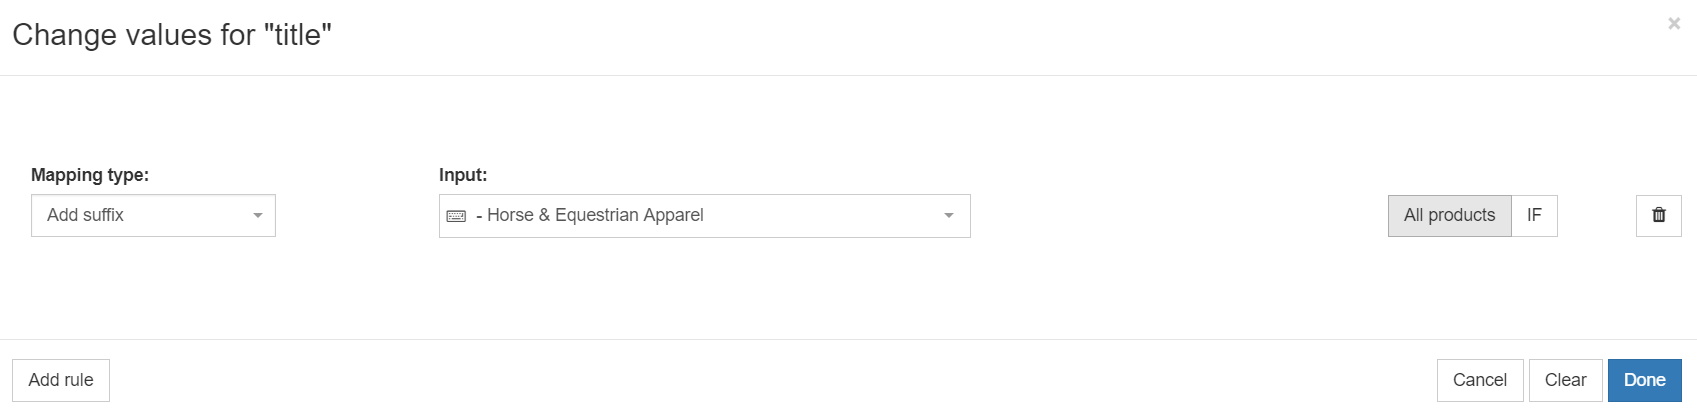
Further to this, you have many options, such as adding static values, or a prefix or suffix to each field. In the example below we’ve added a suffix to the title, allowing us to further optimize the feed with the keywords we want.

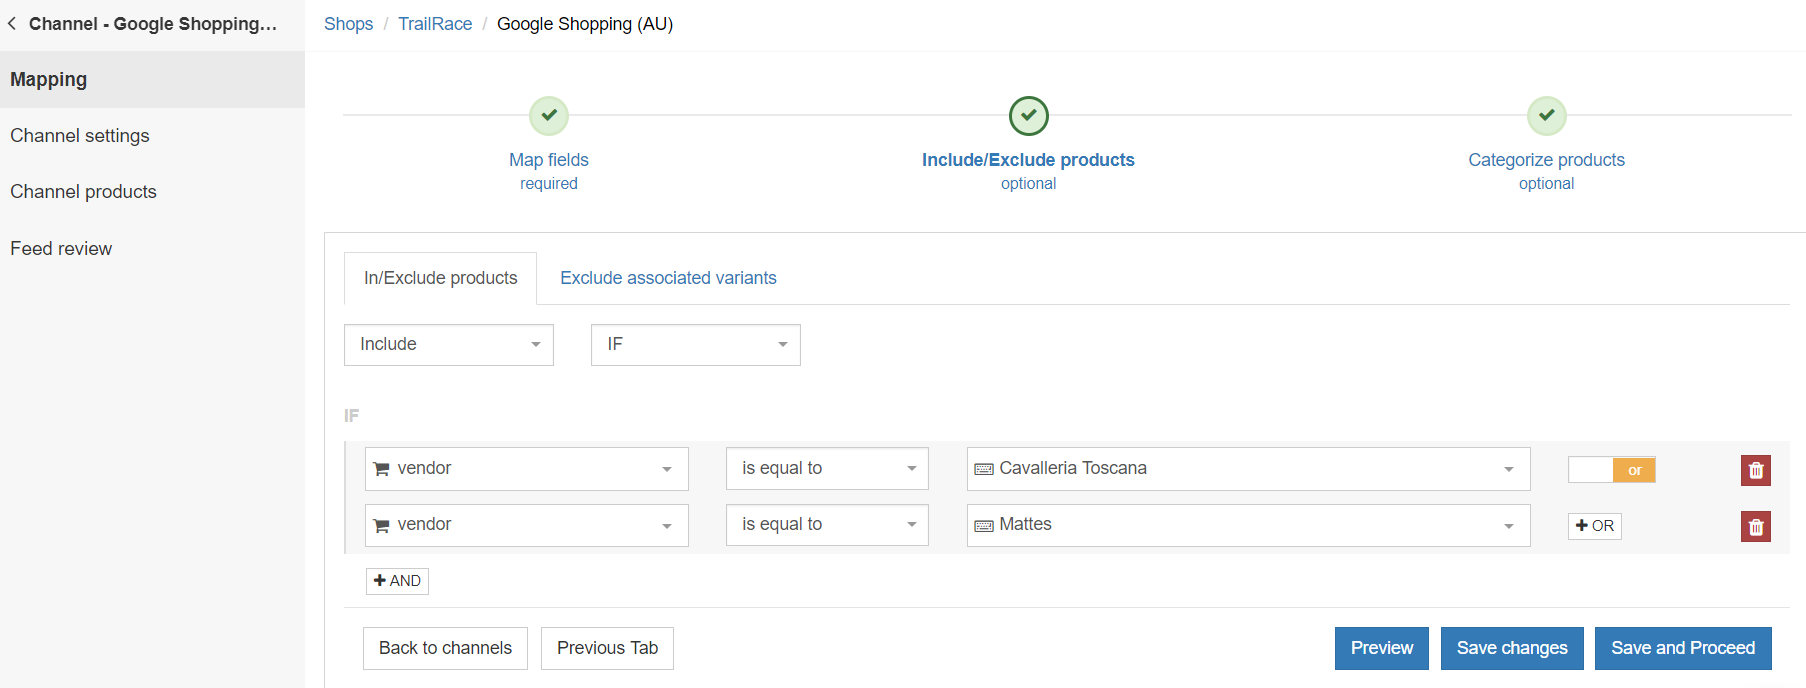
4. Including or Excluding Products
The next step once you’ve mapped your fields, it to exclude or include products. This can be done via the fields that are set in the mapping section, such as vendor, variants, GTIN, titles, etc. So in the example below, we are using the vendor, to only include products within certain collections of our store.

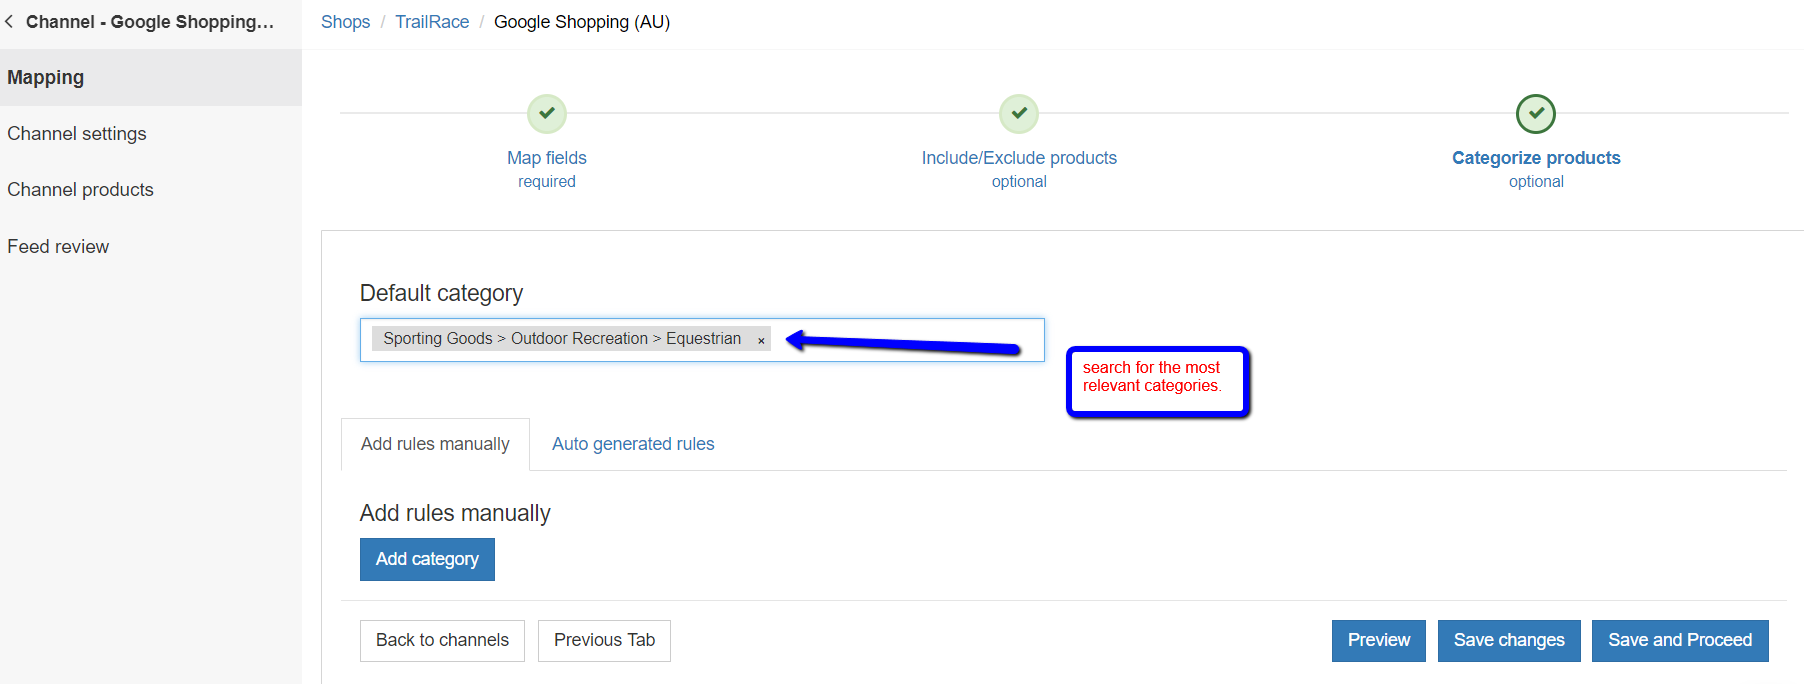
5. Adding Google Shopping categories
This is certainly an overlooked part of creating an optimized feed. Luckily within Datafeedwatch, all the Google Shopping categories are available and you can search for the best option, and then generate rules for specific categories or products within your store. Simply start typing a potential category and you will see the large list available. You can go as deep and as complex as you like for categories, right down to the product level if you like.
This is certainly an extremely important part of setting up any feed, and depending on your products and categories, you should get as specific as you can. For example, if you are selling mattes saddle pads in Australia, for example, you not only need to select the Australian Google shopping feed setup, but also select Equestrian Sports as your top level category, and then work down deeper to the equestrian sub categories.

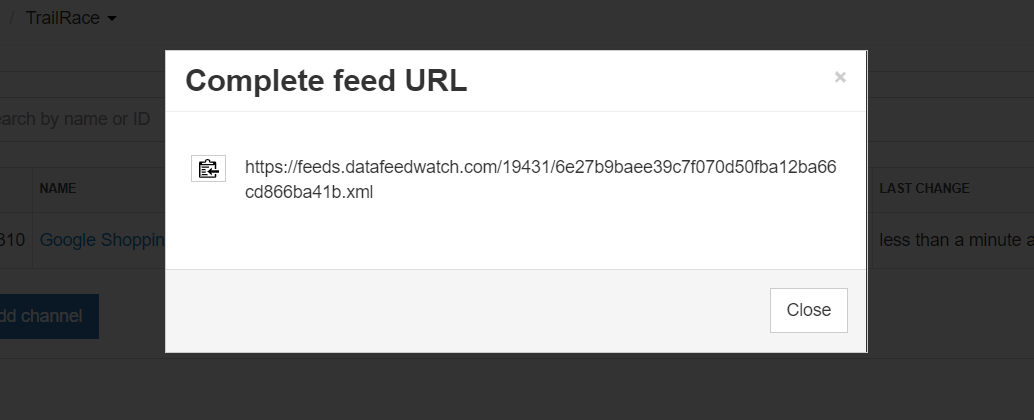
Once you’ve completed this step, your feed will be created and then can be access by clicking the link as per below:


Your feed is then available to upload to Google Merchant Center.

The Main Benefit Of Using DataFeedWatch.com
Many of the major platforms have standard feed options that are available. Shopify has its own shopping feed extension, and WooCommerce has a number of feed plugins available. However none offer the flexibility and details you can achieve with DataFeedWatch. The possibilities are endless and you can constantly test and optimize different elements until you hit the sweet spot. It’s no coincidence that the best Google Shopping campaign managers in the world, understand the success of an advertising campaign is intuitively a function of the quality and optimization of the feed.
Got a large Shopify store?
Want Silicon Dales to optimize and manage your product data feed for you? Just contact us.